Building your first XUL application - step 3
XUL controls like buttons and text entry windows are added next. Semantically meaningful ids are assigned so that each control can be accessed with a javascript.
- Open the
project.xuland begin with this section of the code:<! --used to display message --> <hbox id="contentArea" flex="3">
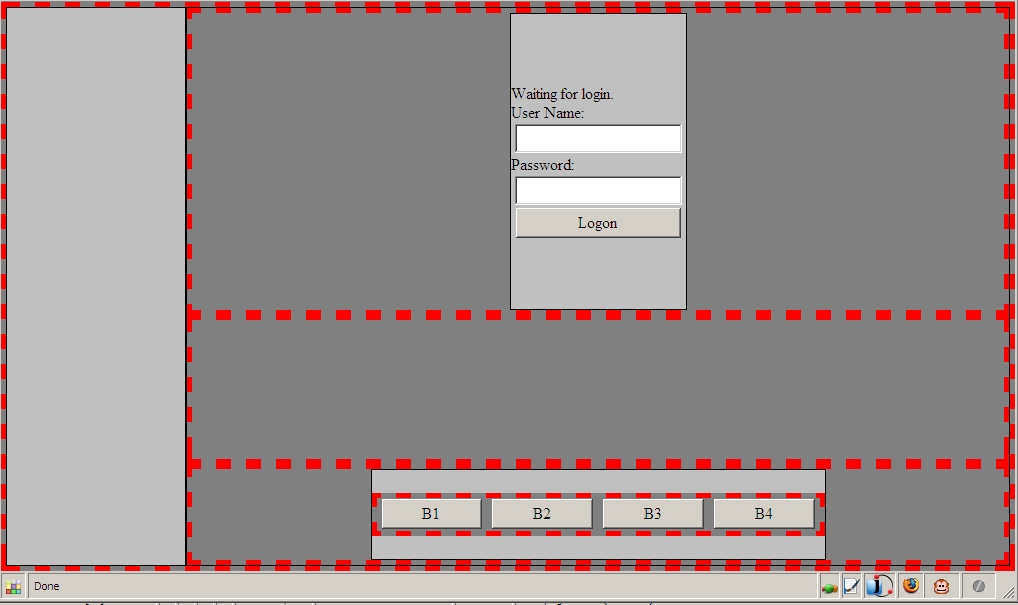
and inside the <hbox> element, add code for the controls as well as <space> elements for good visual layout. Use comments to keep track of the additions.<label value="hbox b - login area"/><!--first add a <spacer> and then a <vbox> inside this <hbox> element so that controls will be stacked vertically--> <spacer flex ="1"/> <vbox> <spacer flex="1"/> <description id="msgDescription"> Waiting for login. </description> <label value="User Name:" control="userName"/> <textbox id="userName"/> <label value="Password:" control="password"/> <textbox id="password" type="password" maxlength="8"/> <button id="loginButton" label="Logon"/> <spacer flex="1"/> </vbox> <spacer flex="1"/> - Next go to this section of the code:
<!-- used to display tool area--> <hbox flex="1" class="test_h"><label value="hbox d - tool area"/><!-- first add a <spacer> and then a <vbox> inside this <hbox> element so that controls will be stacked vertically --> <spacer flex ="1"/> <vbox> <spacer flex="1"/> <!-- add an <hbox> element to stack the buttons horizontally --> <hbox> <button id="B1" label="B1"/> <button id="B2" label="B2"/> <button id="B3" label="B3"/> <button id="B4" label="B4"/> </hbox> <spacer flex="1"/> </vbox> <spacer flex ="1"/>
From Firefox, navigate to the XUL file location and open it.
The result should look like the following:
