Building your first XUL application - step 1
- Open a text editor or XML environment
- Type or paste in the following:
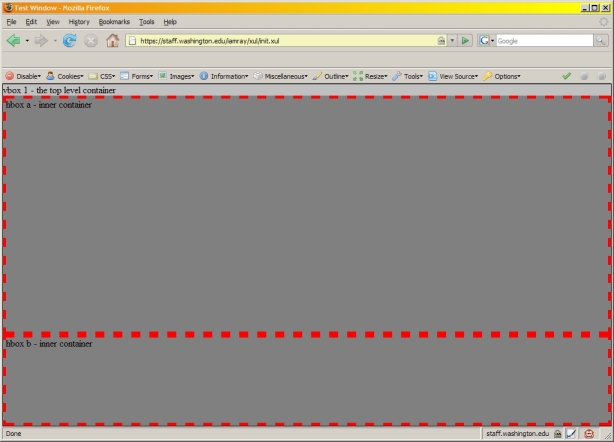
<?xml version="1.0"?> <?xml-stylesheet href="data:text/css, .test_h { background-color:#808080; border-color:red; border-style:dashed; border-width:thick; } .test_v { background-color:#c0c0c0; border-color:black; border-style:solid; border-width:thin; } "?> <window id="theMainWindow" title="Test Window" orient="horizontal" xmlns:xlink="http://www.w3.org/1999/xlink" xmlns="http://www.mozilla.org/keymaster/gatekeeper/there.is.only.xul"> - Below the last line, add the following, to create a simple layout:
<vbox flex="1" class="test_v"> <label value="vbox 1 - the top level container"/> <hbox flex="3" class="test_h"> <label value="hbox a - inner container"/> </hbox> <hbox flex="1" class="test_h"> <label value="hbox b - inner container"/> </hbox> </vbox> </window> - Save the result as
project.xul.
From Firefox, navigate to the XUL file location and open it. The result should look like the following: